基于docker搭建的gitlab实现CI/CD
基于docker搭建的gitlab实现CI/CD
ivansli在开发过程中,提起CI/CD就会想到使用gitlab来实现。本文使用docker搭建gitlab环境,基于官方文档说明并尝试对常见CI/CD操作做讲解说明。
1.gitlab 所需硬件配置
目前,gitlab对内存要求最小是4G。本文使用服务器配置:阿里云ECS,4核8G
配置低的话,容易把系统搞死,gitlab 比较占资源
2.安装docker
卸载老版本docker
1
2
3
4
5
6
7
8
yum remove docker \
docker-client \
docker-client-latest \
docker-common \
docker-latest \
docker-latest-logrotate \
docker-logrotate \
docker-engine安装docker基础包
1
yum install -y yum-utils device-mapper-persistent-data lvm2
设置仓库
1
yum-config-manager --add-repo https://mirrors.aliyun.com/docker-ce/linux/centos/docker-ce.repo
安装docker引擎
1
2
3
4
5
6安装最新版本(latest)
yum install docker-ce docker-ce-cli containerd.io
查看版本
yum list docker-ce --showduplicates | sort -r
安装指定版本
sudo yum install docker-ce-<VERSION_STRING> docker-ce-cli-<VERSION_STRING> containerd.io启动docker
1
[root@linux-4core-8g-centos64 ~]$ sudo systemctl start docker
执行 docker ps,看到下面内容
1 | CONTAINER ID IMAGE COMMAND CREATED STATUS PORTS NAMES |
启动一个 docker 镜像测试验证
1 | [root@linux-4core-8g-centos64 ~]$ docker run hello-world |
此时 docker 安装成功。
3.安装gitlab镜像
1 | sudo docker run --detach \ |
参数说明
hostname 域名或ip
gitlab.ihero.ren 是笔者自己域名,容器启动后可通过域名访问。域名需要解析到对应的主机IP上
publish 端口映射
restart 重启方式
gitlab/gitlab-ce:latest 镜像名称
volume 目录挂载
使用 docker ps 查看容器启动情况
1 | [root@linux-4core-8g-centos64 ~]$ docker ps |
看到 STATUS (healthy) 意味着已经启动成功,此时在浏览器通过域名访问。
查看 gitlab 初始root默认密码
1 | 进到容器中 |
此时,使用root默认密码登录,登录之后修改密码,并创建测试用的代码仓库。
4.安装 gitlab runner
runner 作为一个单独的容器支撑 gitlab 中 job 命令的执行,runner可以配置多个,每个 runner 配置自己 tag。
1 | sudo docker run -d --name gitlab-runner -p 8093:8093 --restart always \ |
runner 对外暴露的端口 8093
查看runner容器启动情况
1 | [root@linux-4core-8g-centos64 ~]# docker ps |
可以看到 gitlab-runner 容器监听在 8093端口。
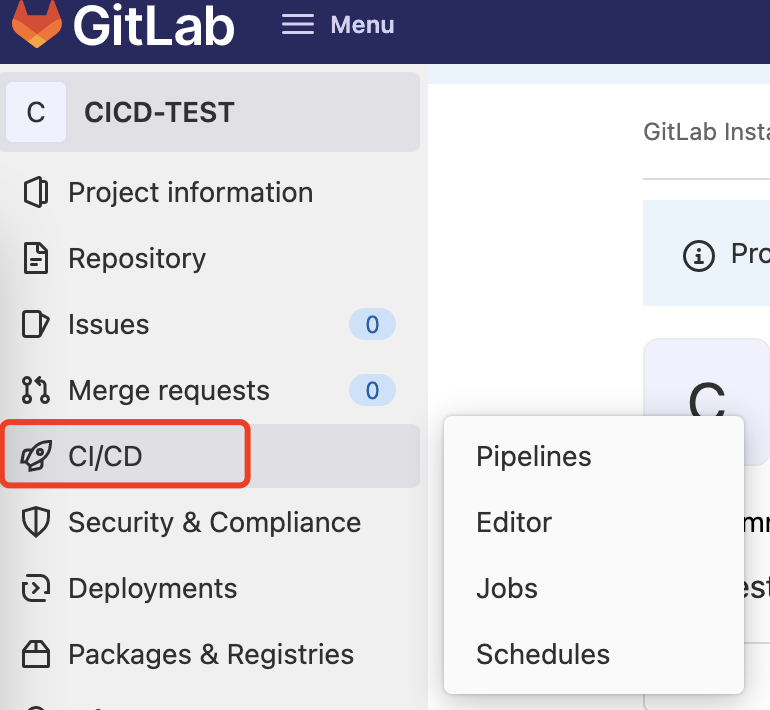
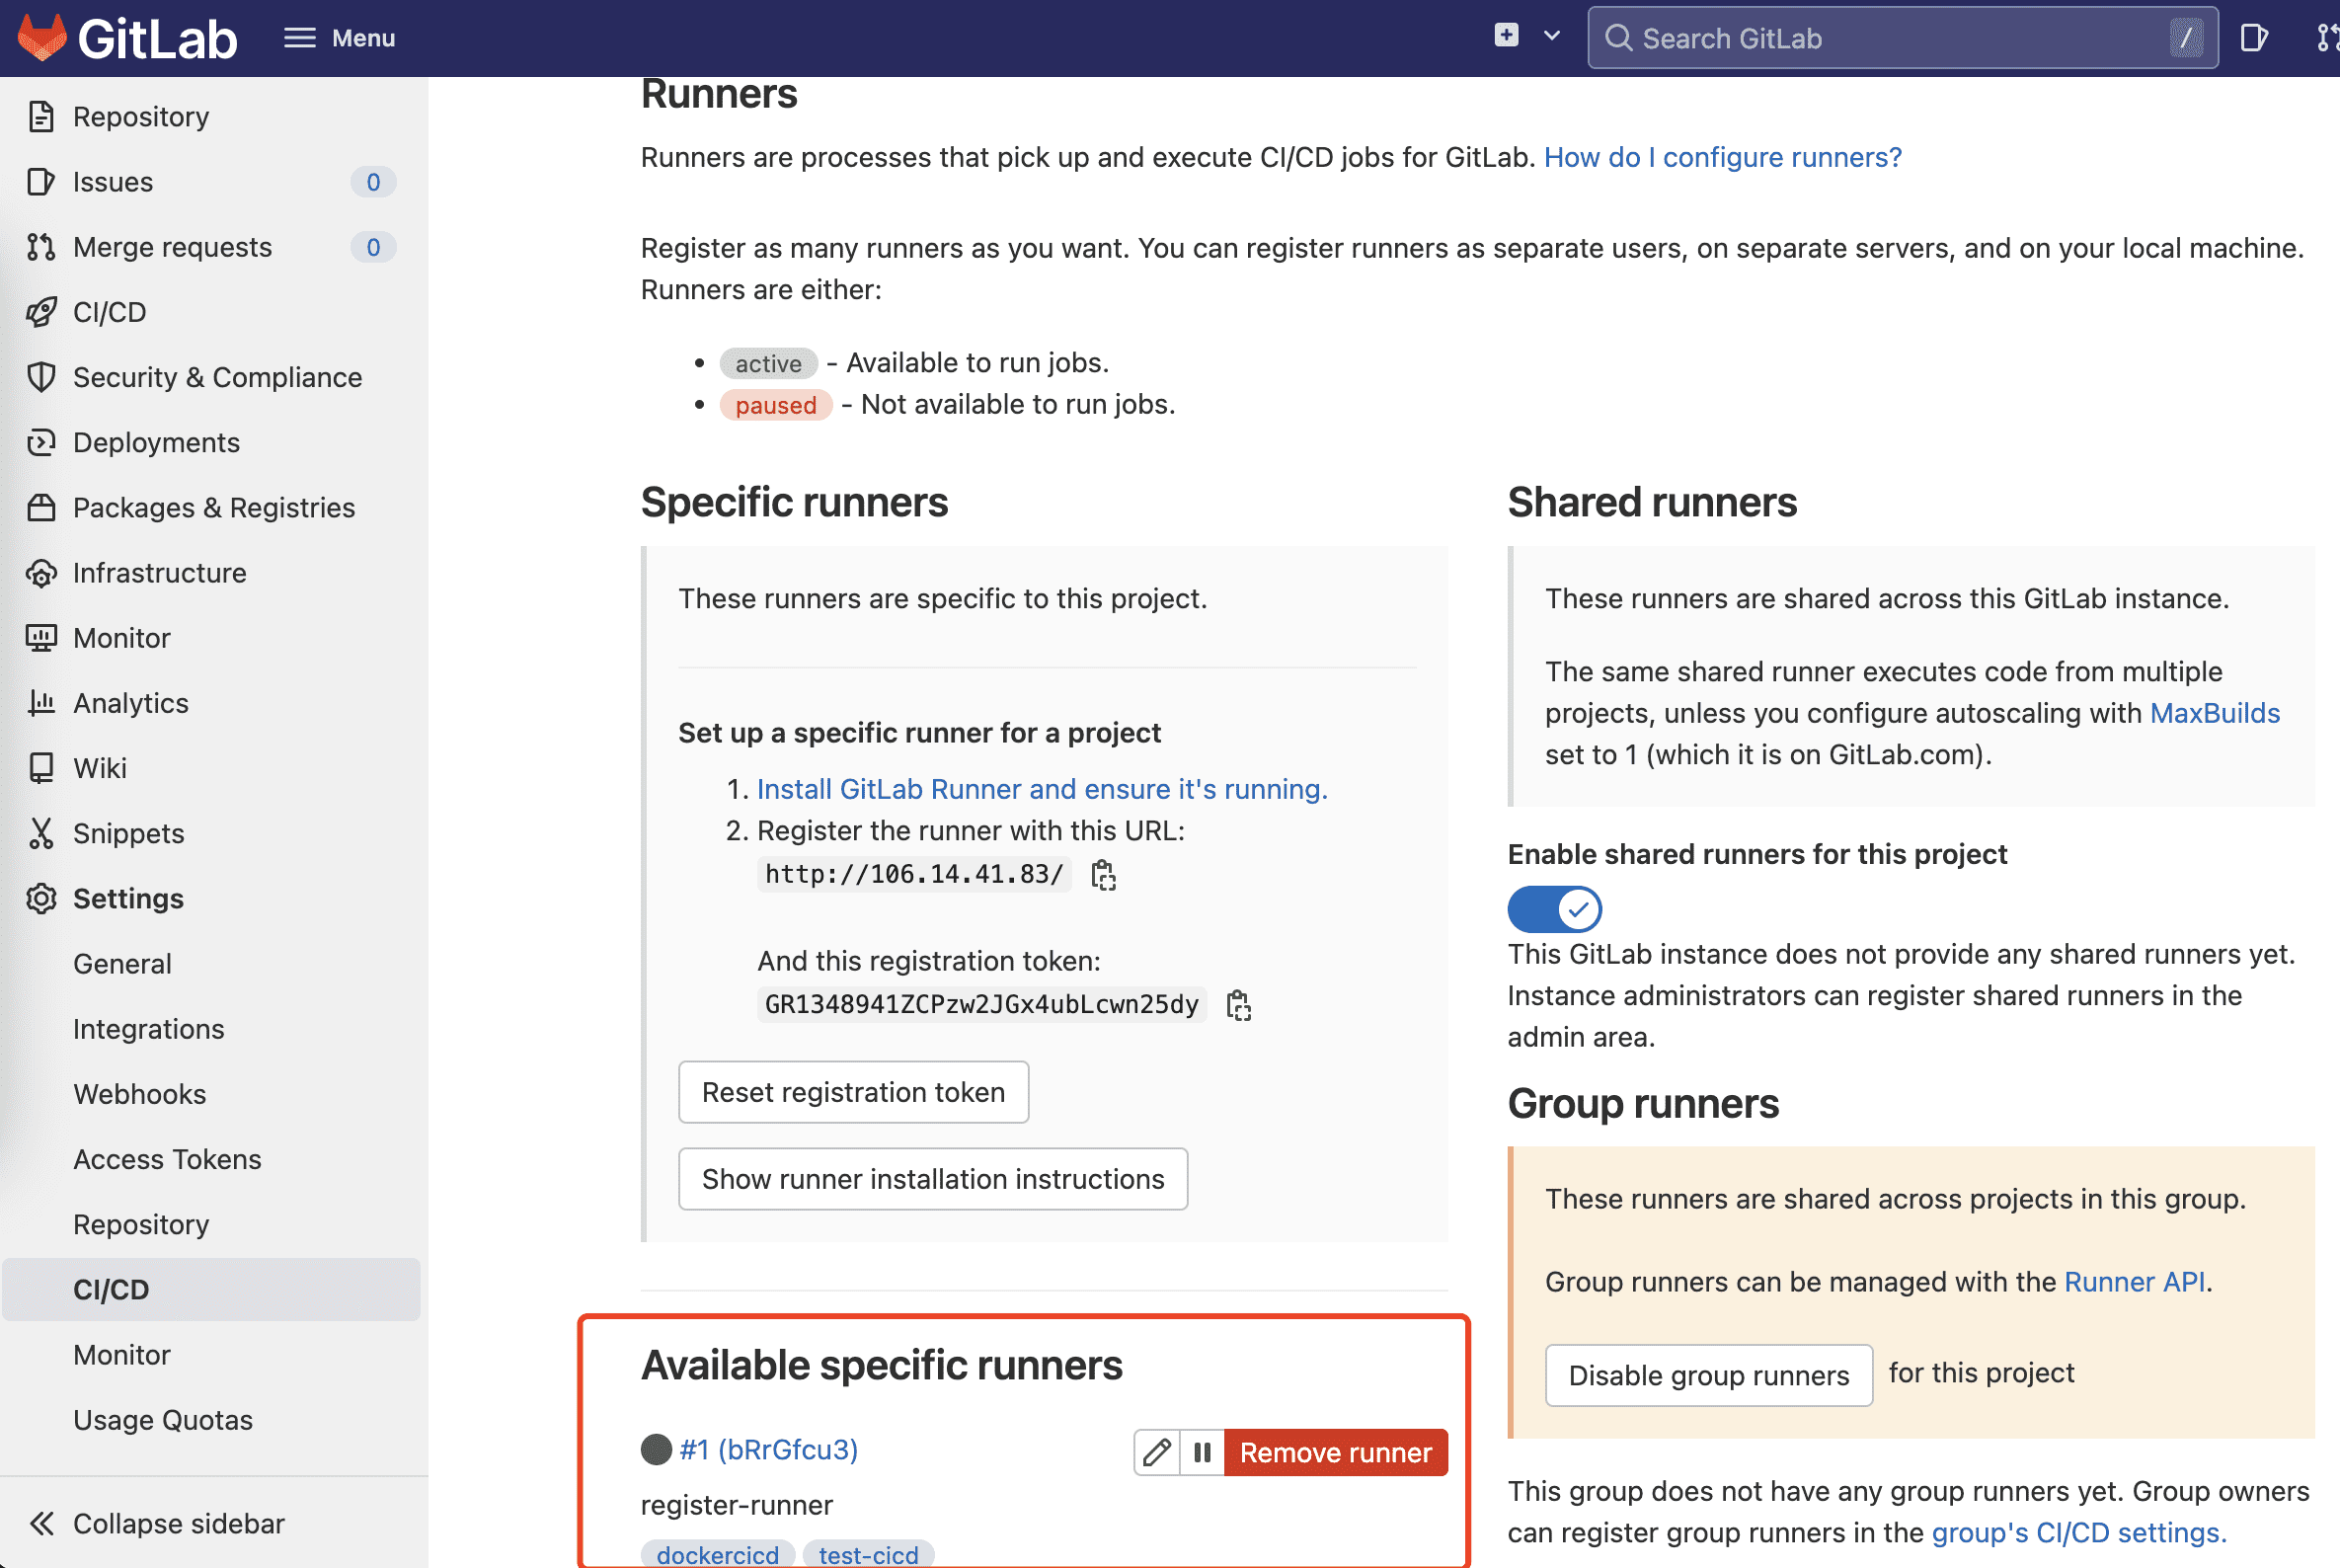
5.注册gitlab runner到gitlab
gitlab -> Setting 获取 runner registration token
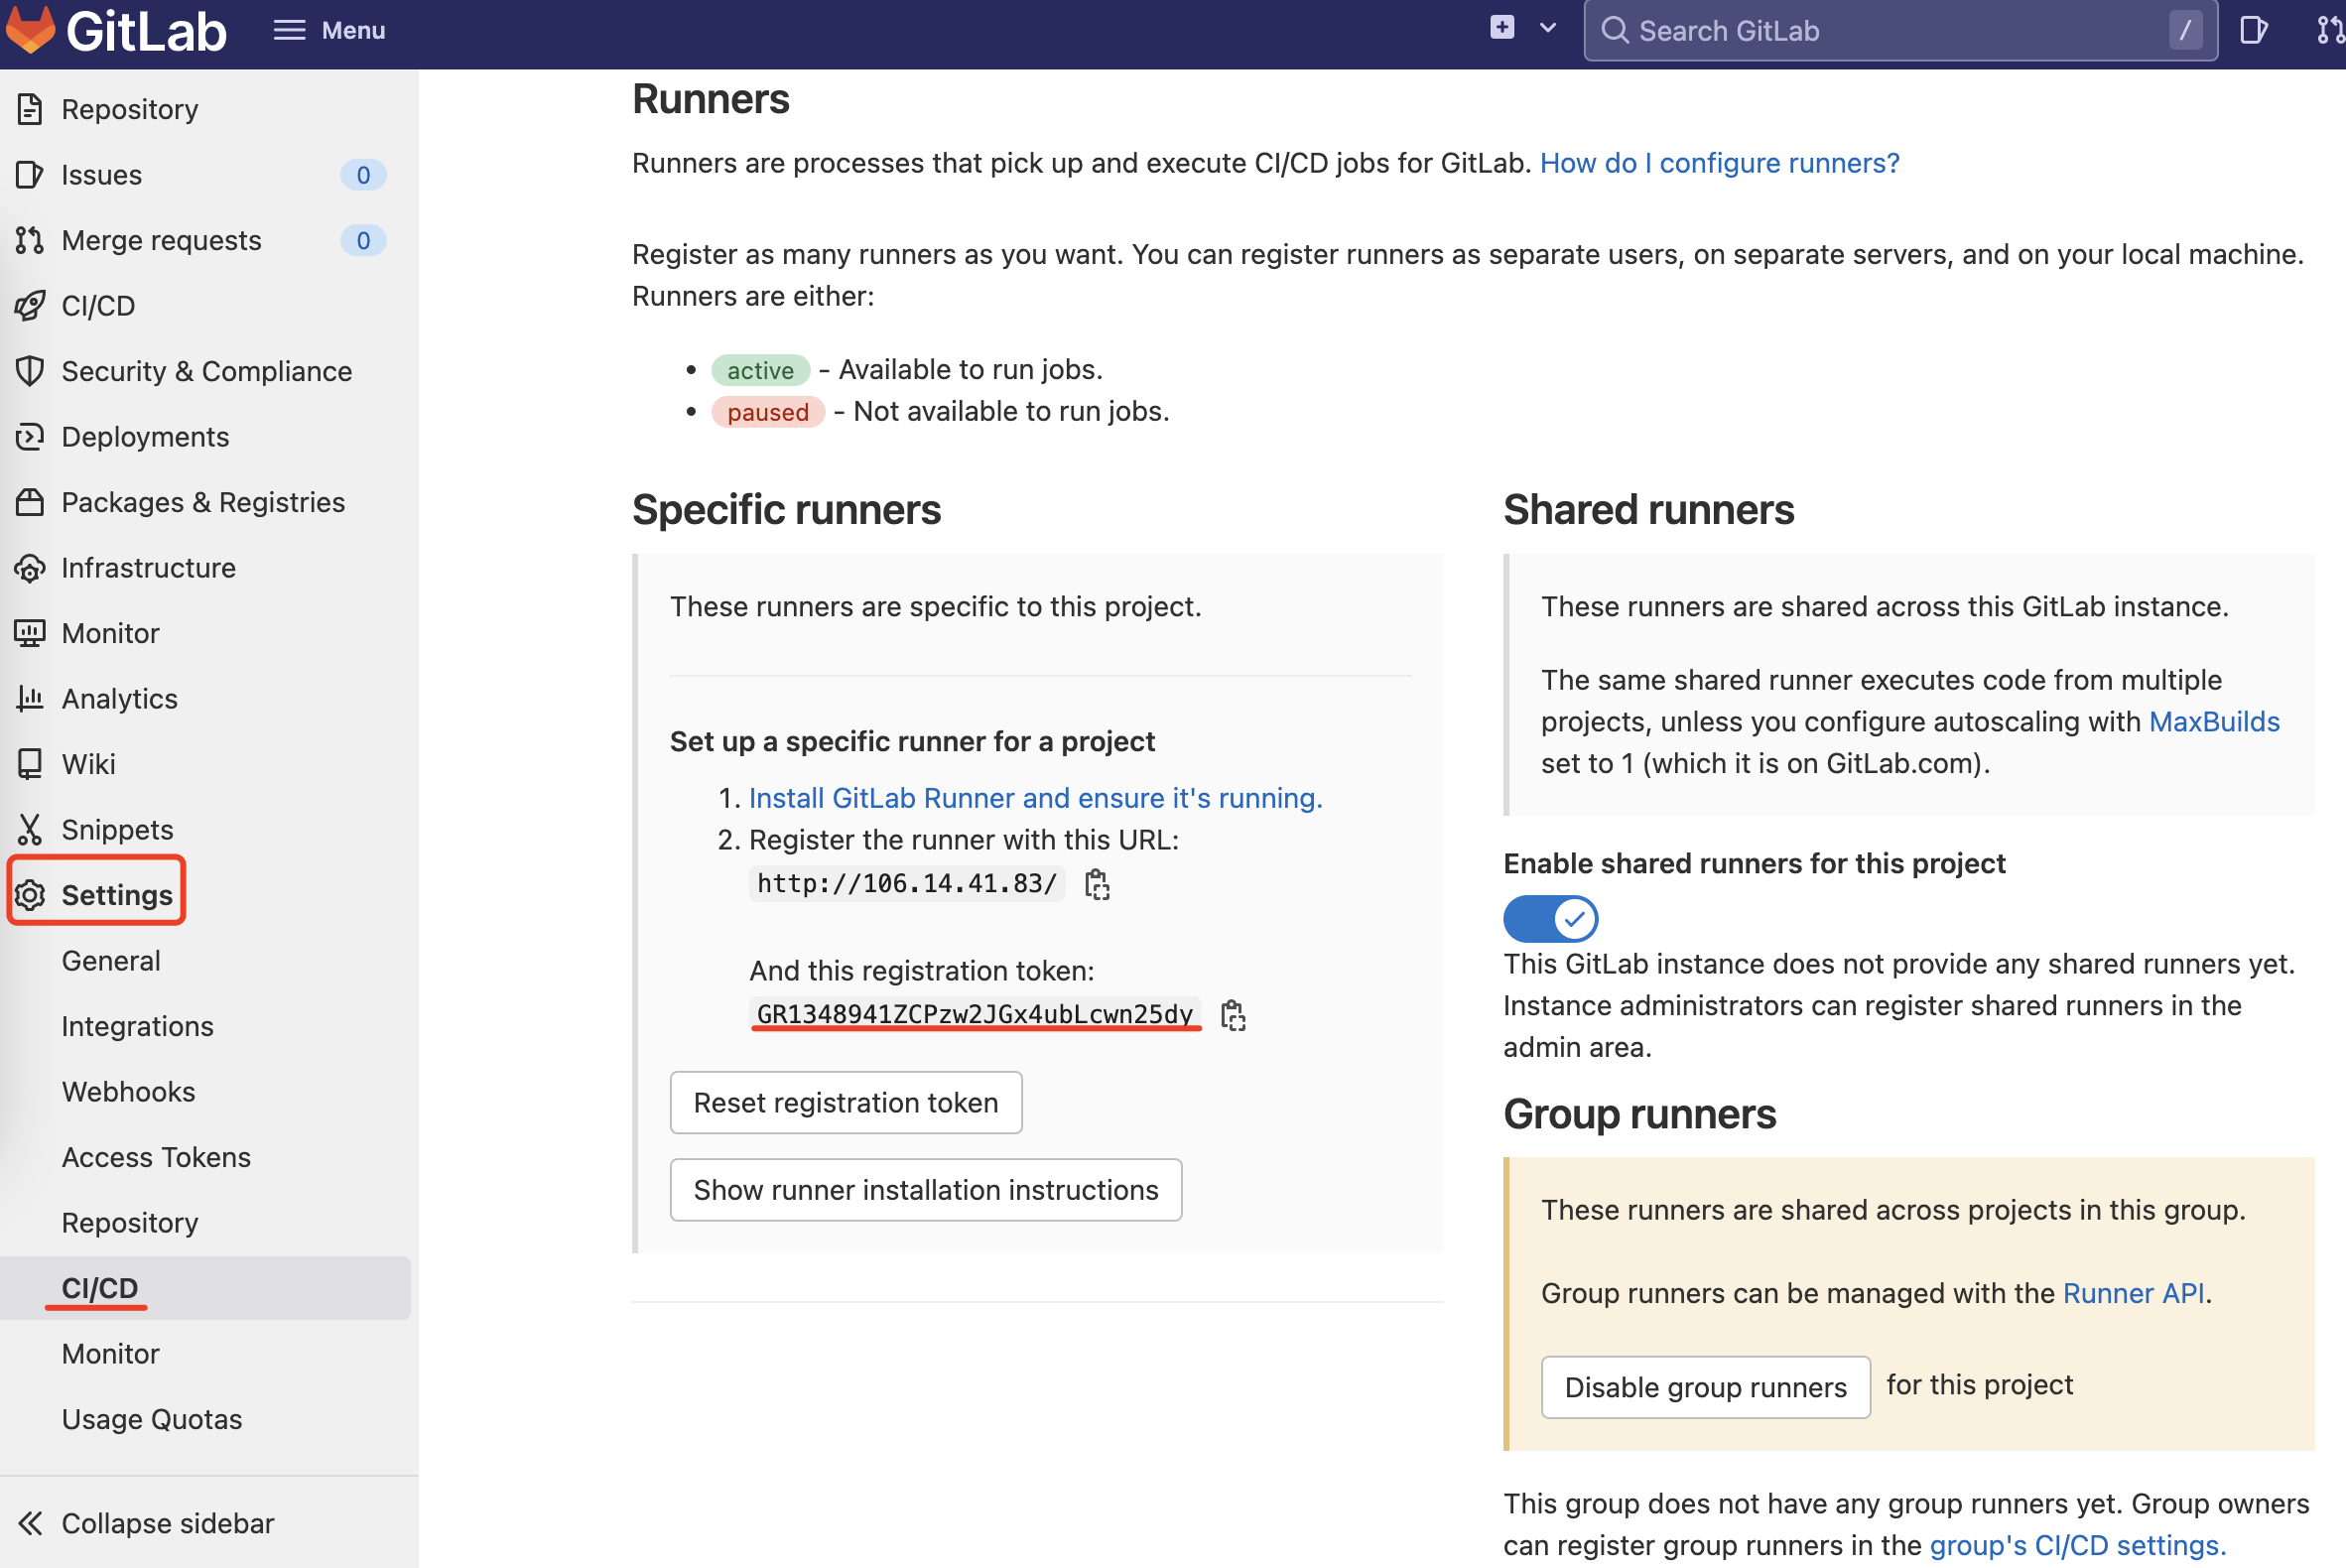
runner 注册到 gitlab
1 | docker run --rm -v /srv/gitlab-runner/config:/etc/gitlab-runner gitlab/gitlab-runner register \ |
参数说明
–url 是gitlab的地址
–registration-token 是gitlab中分配给注册runner用的token
–tag-list 当前runner的tag,用在 .gitlab-ci.yml 中 tags选项指定使用哪个runner
在 gitlab 中查看 runner 注册是否成功,如下所示多了一个可用的 runner,它的 tag-list 为 test-cicd, dockercicd
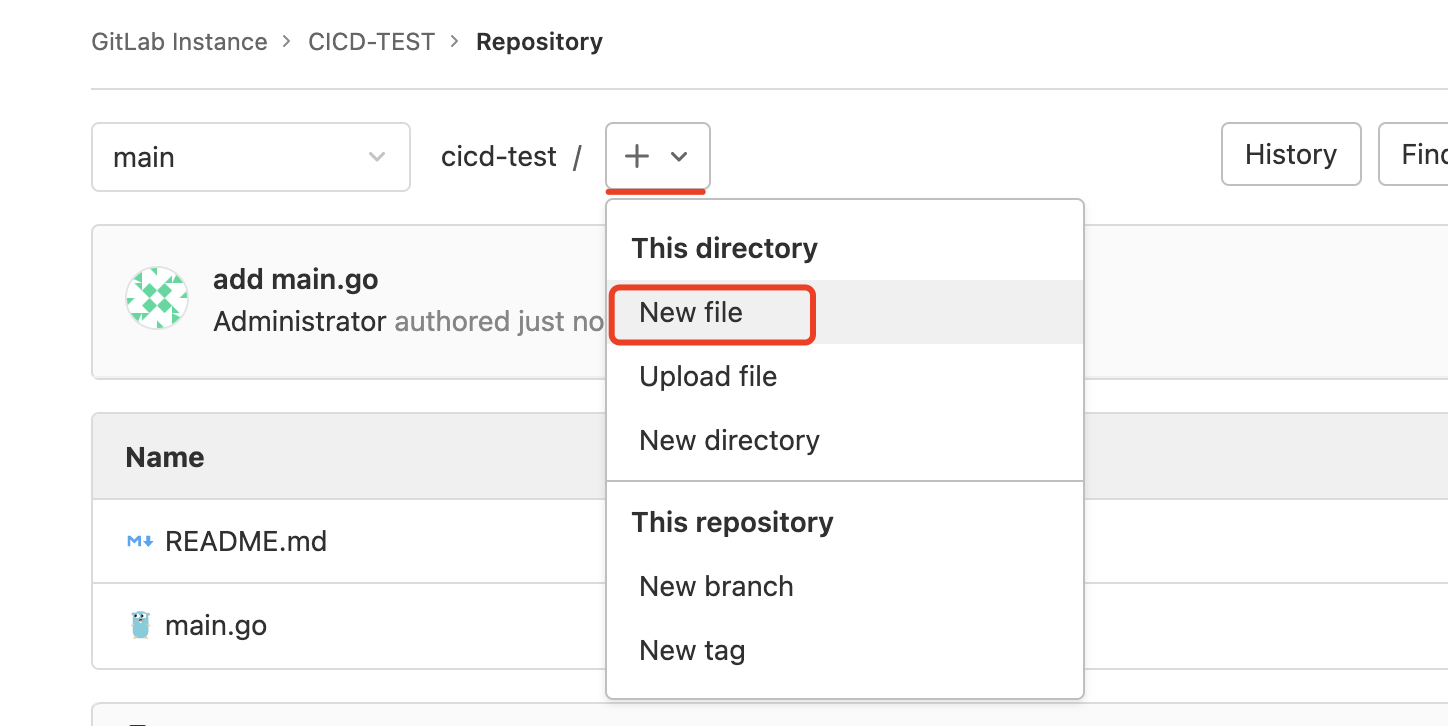
6.添加 CI/CD文件.gitlab-ci.yml
选择默认模板
7.概念与实践
官方手册是最好的文档
https://docs.gitlab.com/ee/ci/
.gitlab-ci.yml使用yaml语法格式
首先,理清几个核心概念:
- Pipelines
- Stage
- Jobs
Pipelines 是持续集成、交付和部署的顶级组成部分,其组成包括:
- Jobs,定义该怎么做。例如,编译或测试代码的作业
- Stage,定义何时运行工作。例如,在编译代码的阶段后运行测试的阶段
Jobs 由 runner 执行。如果有足够的并发runner,同一阶段的多个Jobs在同一阶段并行执行。
举一个实际例子,如下所示:
1 | # 整个 yaml 构成一个 `Pipelines` |
关键字
最新 GitLab CI/CD 官方文档中,大概列出了30多个关键词,其中有31个 job 关键词是:
before_script
定义每个job执行前运行的命令数组
after_script
定义每个job执行完后运行的命令数组,包括失败的作业
allow_failure
写在job中,指明作业失败时,是否应继续运行 pipeline
artifacts
cache
将当前环境目录中的一些文件、文件夹缓存起来,在其他 job 中使用
coverage
dependencies
dast_configuration
environment
来定义工作部署的环境变量
only
定义什么时候执行 job
except
与 only 相反,定义什么时候不执行 job
extends
image
指明 执行 job 所使用的容器环境
inherit
interruptible
needs
pages
parallel
release
resource_group
retry
失败后可以重试的次数,只能是:0 (default), 1, or 2
rules
script
job 就提执行的动作,一组 shell 命令
secrets
services
stage
用在 job 中指定当前 job 所属的 stage,为全局 stages 中一个具体值
tags
使用 tags 从所有可用于项目的 runner 列表中选择一个特定的 runner
timeout
定义 job 执行的超时时间,如果 job 执行时间超过 timeout,则视为失败
trigger
variables
定义 job 所需的环境变量
when
job 何时执行
此外5个全局关键词分别是:
stages
设置全局 执行 stage
如果 .gitlab-ci.yml 文件中没有 stages,默认的stages为:.pre / build / test / deploy / .postworkflow
include
加载其他 .gitlab-ci.yml 文件到当前的 CI/CD配置中
default
variables
变量的定义方式
变量的定义方式目前主要分为3种:
1.在 .gitlab-ci.yml 文件中自定义
2.gitlab pipeline 中预定义的变量
https://docs.gitlab.com/ee/ci/variables/predefined_variables.html
3.在项目中设置
Setting > CI/CD -> Variables
变量用在哪里
目前,主要用在2个地方:
https://docs.gitlab.com/ee/ci/variables/where_variables_can_be_used.html
1.gitlab 的 .gitlab-ci.yml 文件中
2.GitLab Runner 的 config.toml 文件中
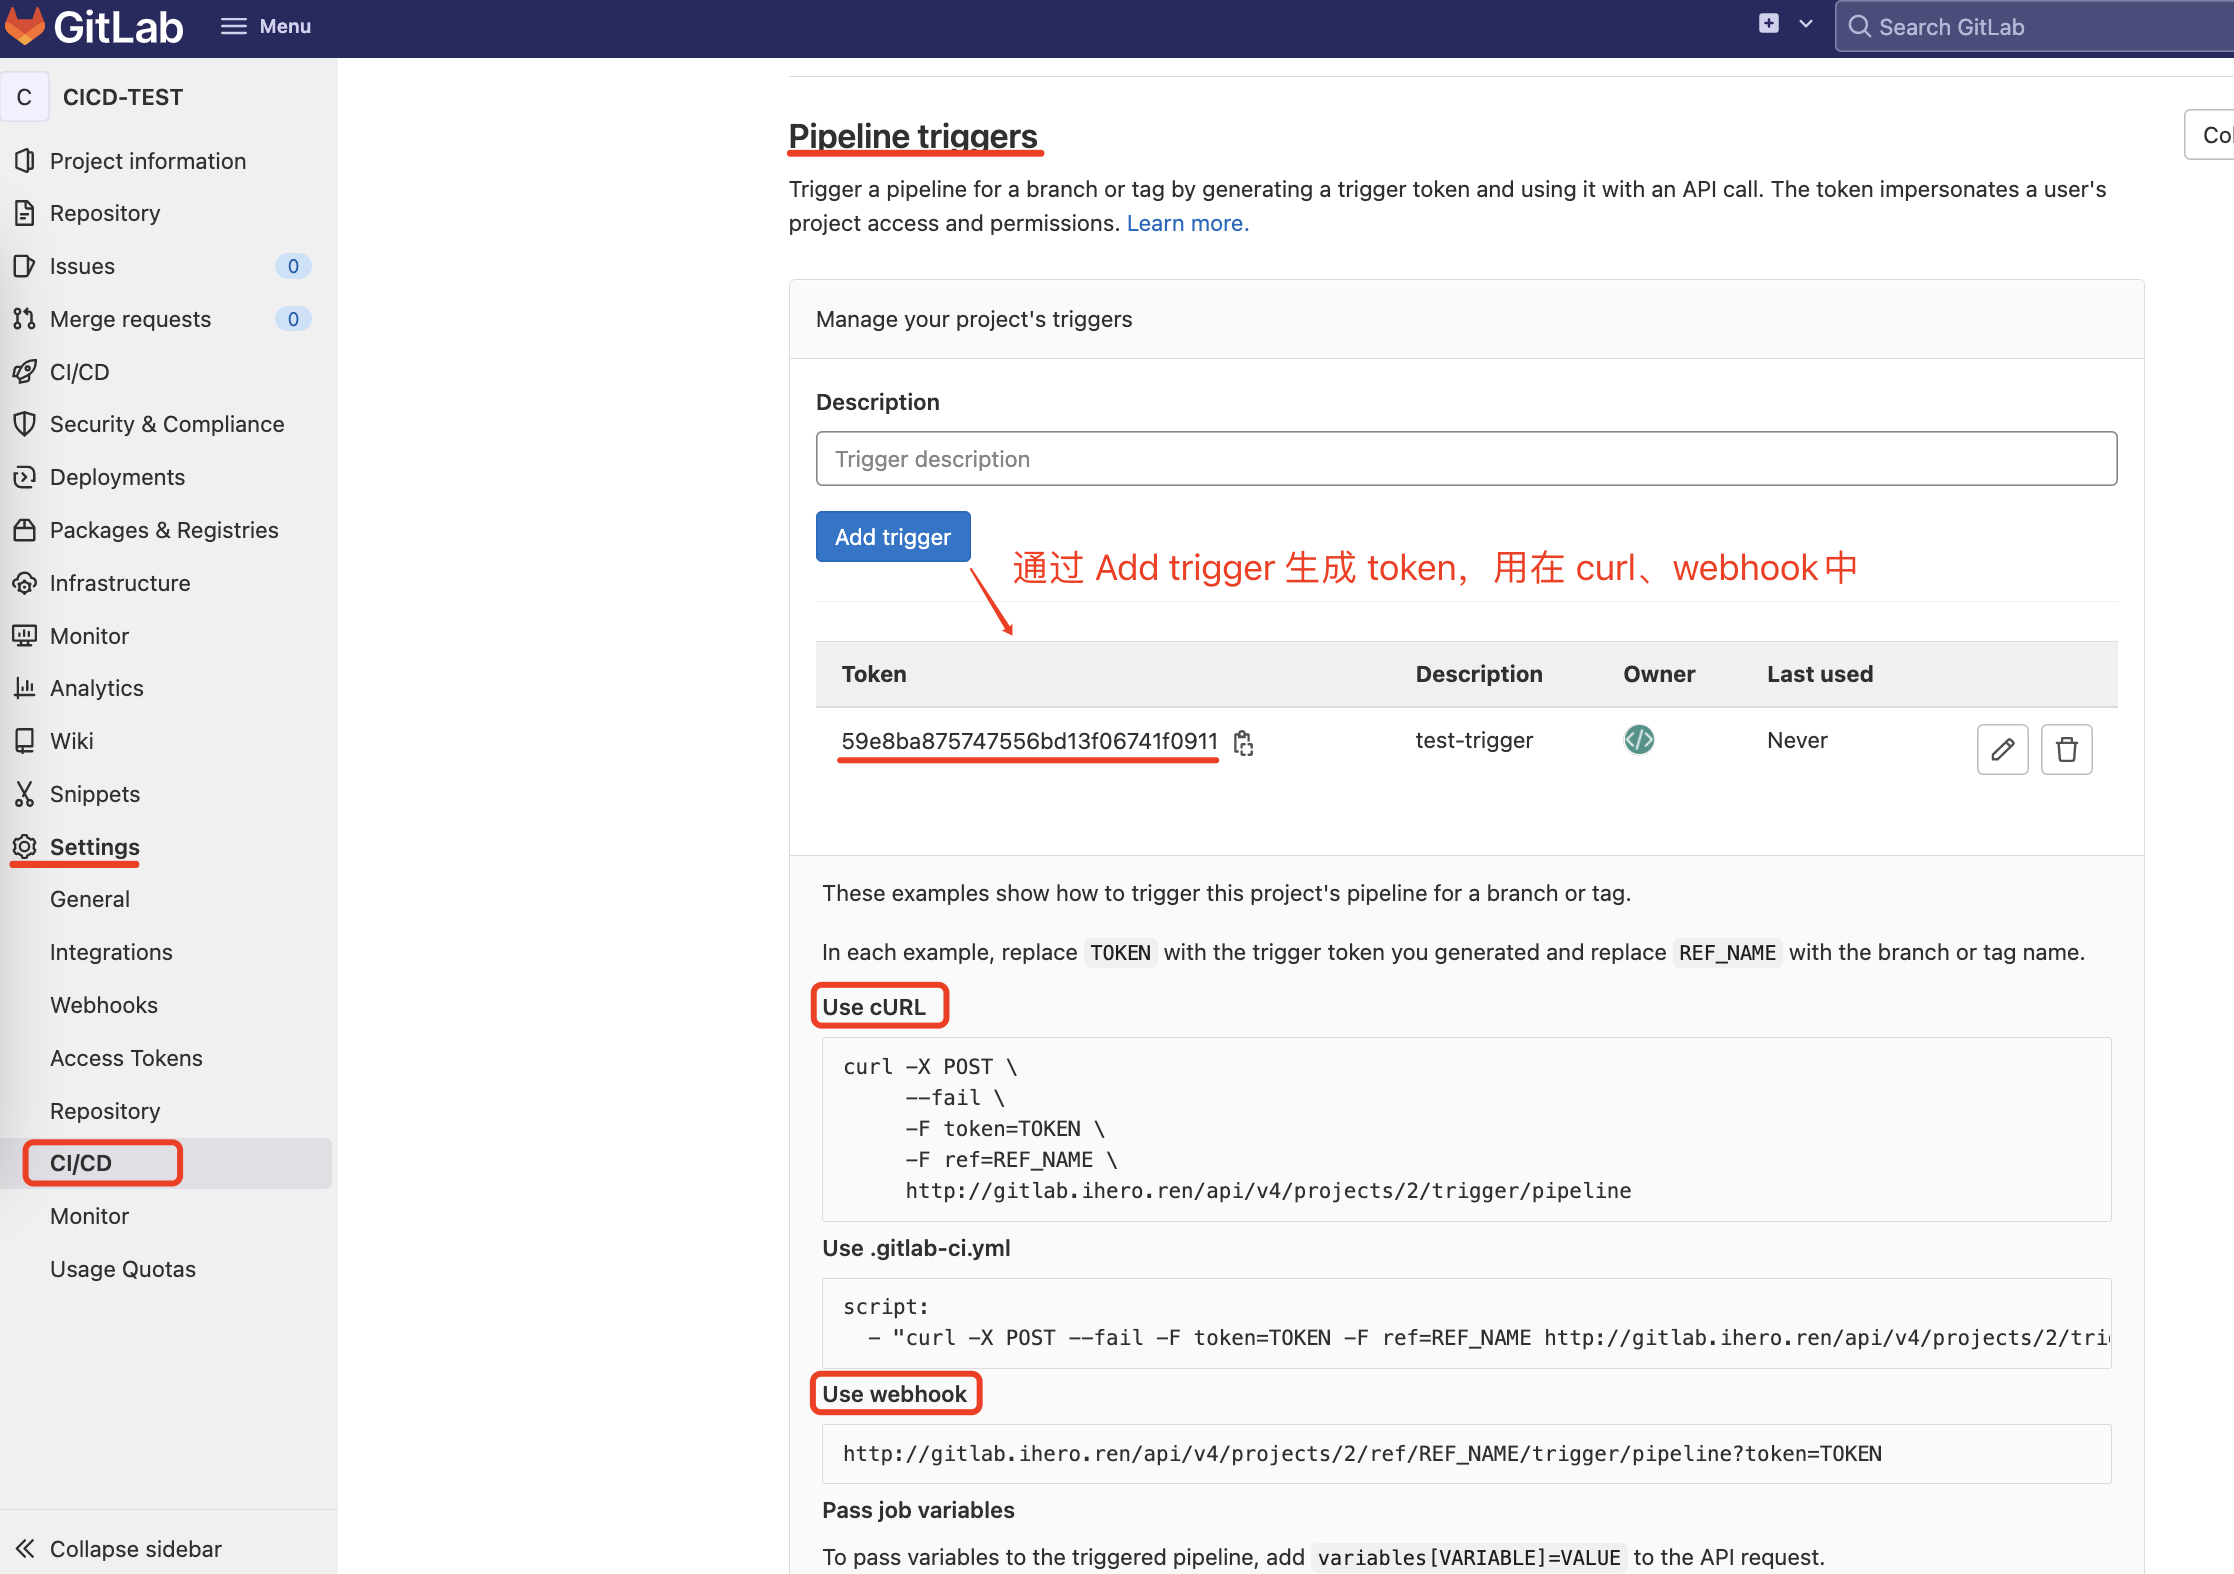
Pipeline triggers
Pipeline 触发方式目前大概分为4种:
1.代码推送触发
https://docs.gitlab.com/ee/ci/yaml/#trigger
通过在 .gitlab-ci.yml 文件中设置 trigger 来实现,运行特定 branch,tag 或 commit 的 Pipeline
2.定时任务触发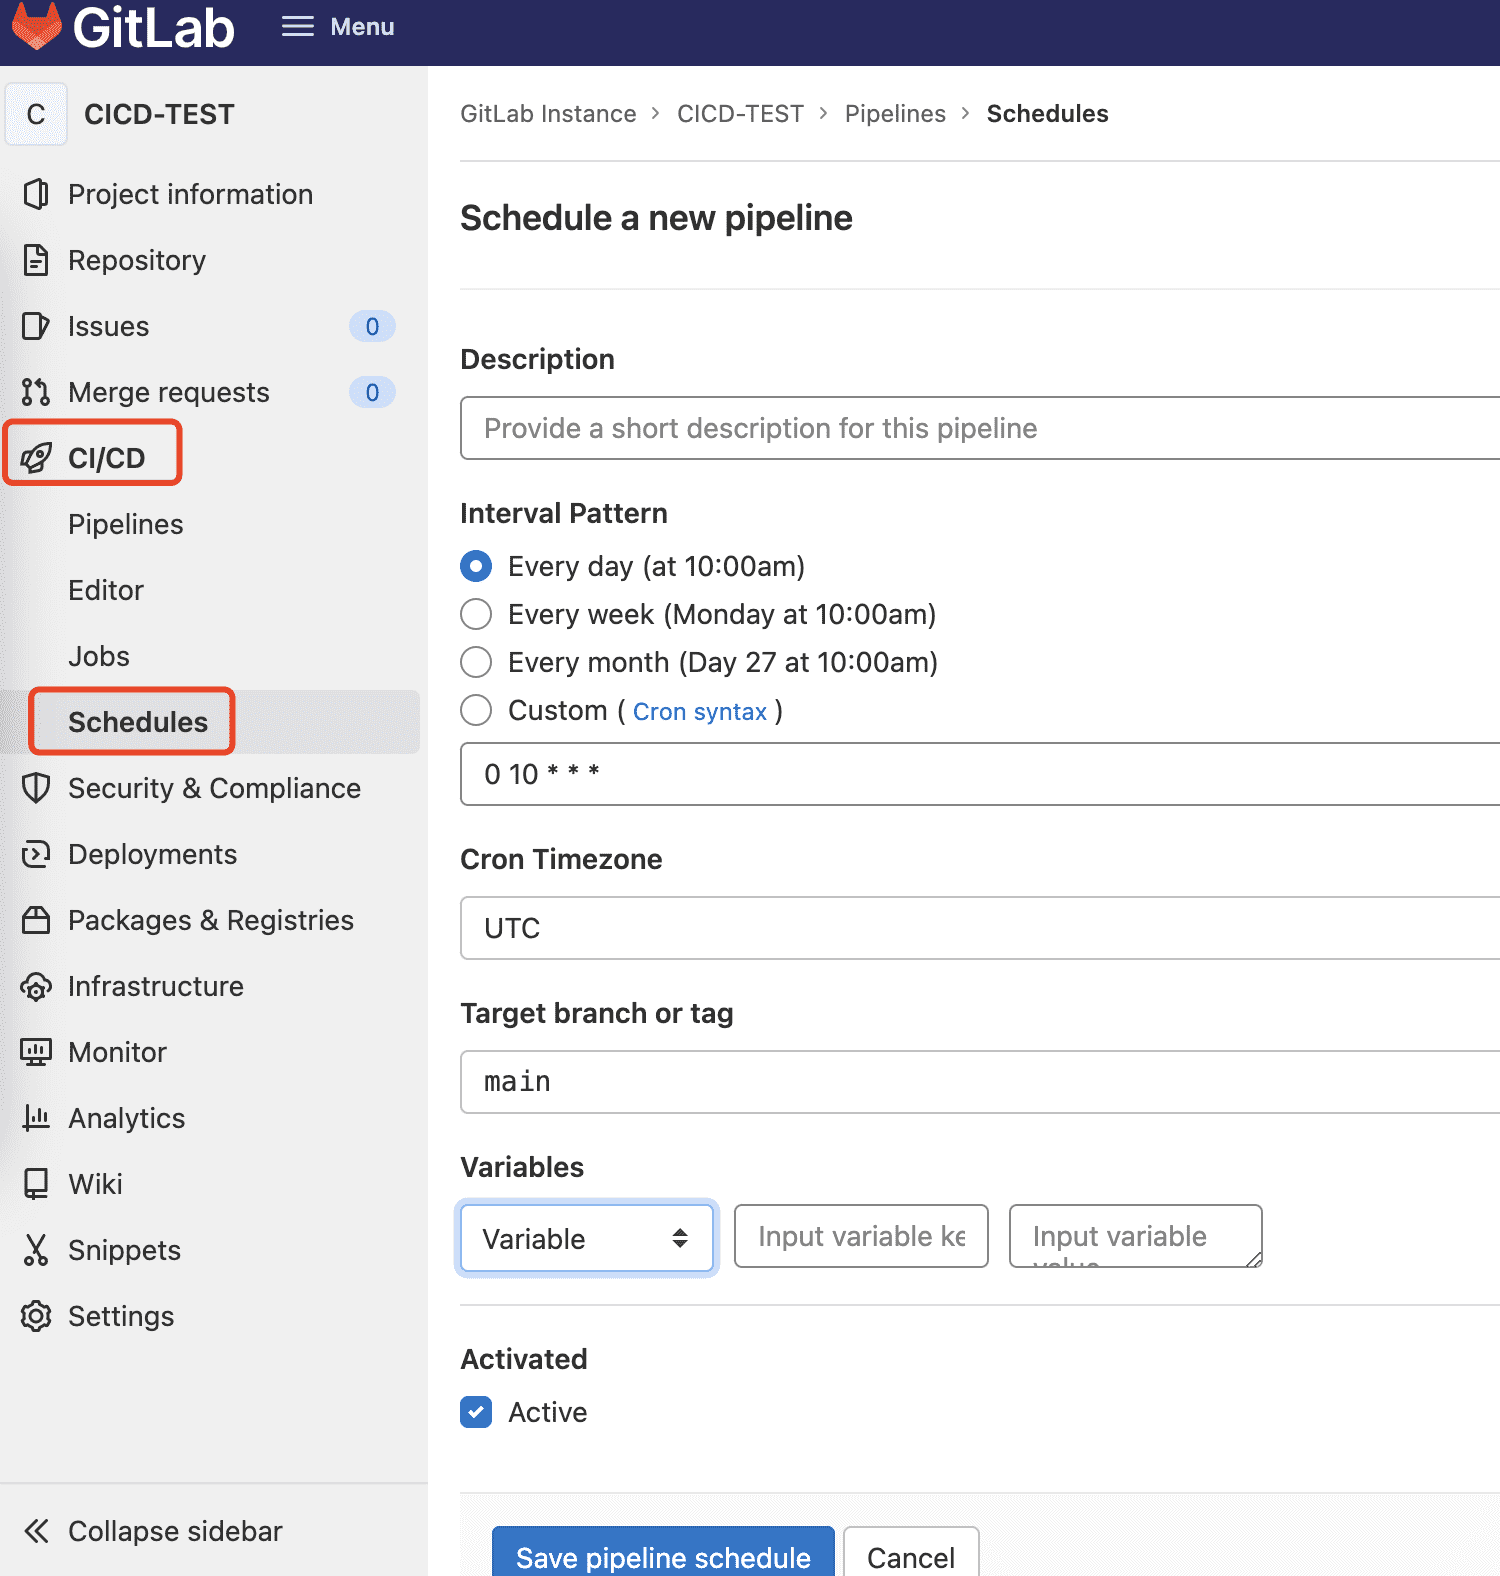
3.调用接口触发
4.web hook 触发
3、4的触发方式可以在 Setting -> CI/CD -> Pipeline triggers 看到
流水线实践与调试
- interruptible
1 | stages: |
新的 pipeline 取消旧的 pipeline,需要同时具备以下两点:
① 旧的 pipeline 刚好在执行设置了 interruptible 的job, 并且它处于 running or pending 状态
② Setting -> CI/CD -> General pipelines -> 勾选 Auto-cancel redundant pipelines 选项
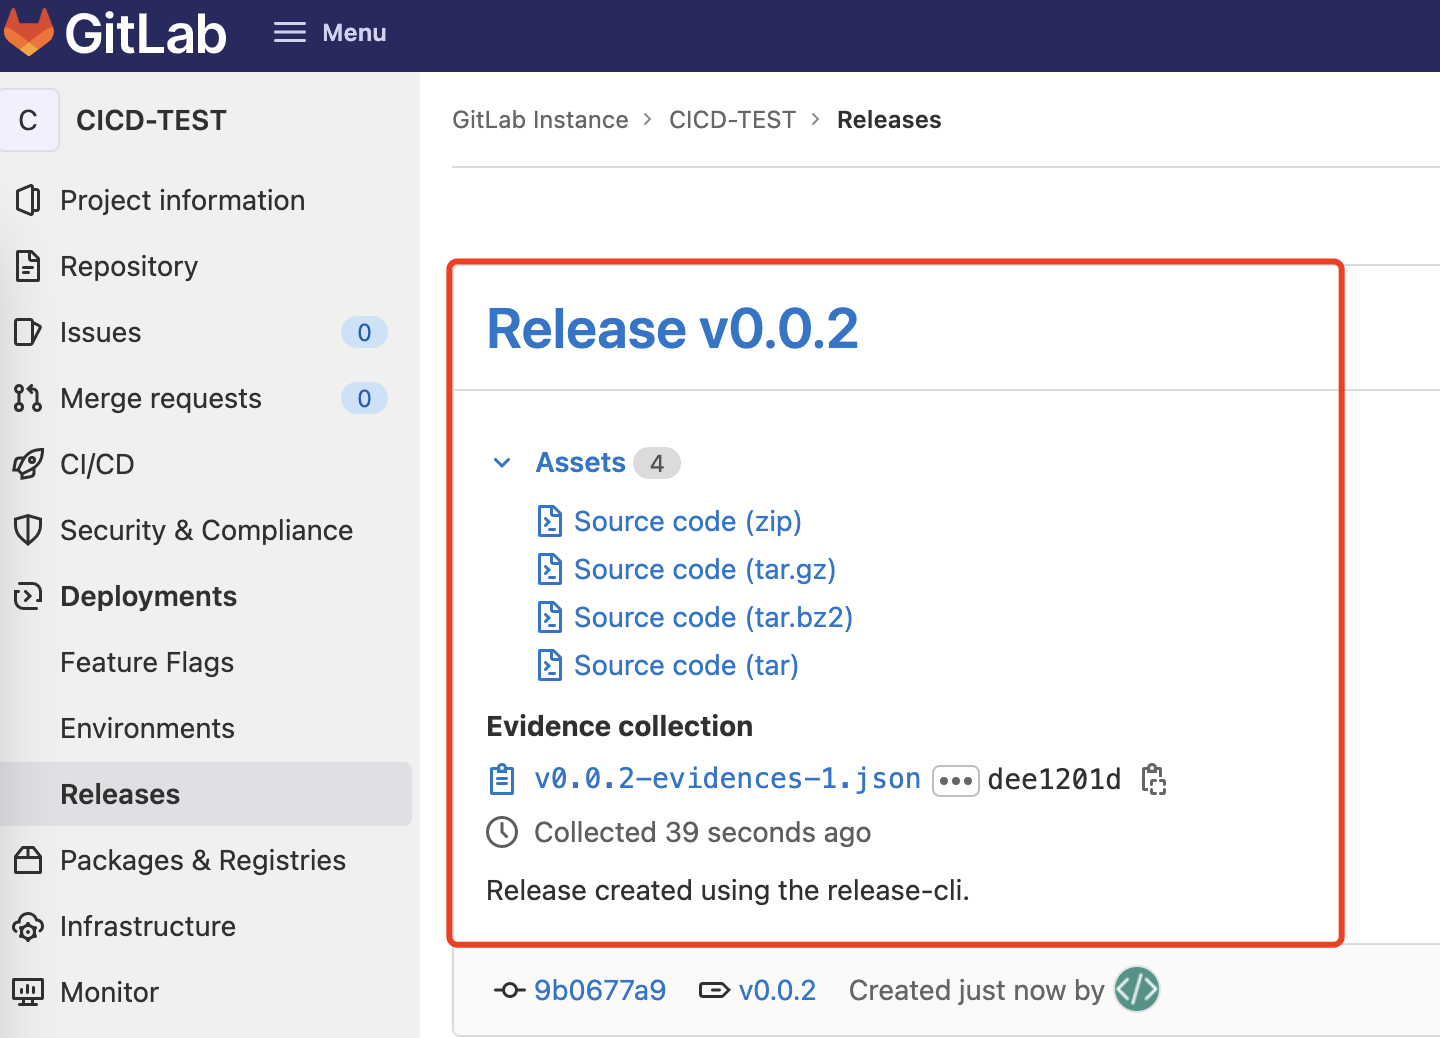
- release
在使用git打tag后,创建 release
1 | stages: |
- timeout
如果某个 job 执行非常耗时,在执行时间超过 timeout 设置之后,则 job 执行失败
1 | build: |
- resource_group
使用 Resource_group 创建一个资源组,以确保 job 在同一项目的不同 pipelines 中相互排斥。
https://docs.gitlab.com/ee/ci/yaml/#resource_group
如果是多个 pipelines并行执行,用于限定 job 只能同时由一个 pipelines 执行,类似于编程语言中的信号量
resource_group 的值只要不是保留关键字就行
1 | deploy-to-production: |
多个 pipelines 同时执行,保证同时只有一个在执行 deploy-to-production,一般在发布所在的 job 中设置此项。
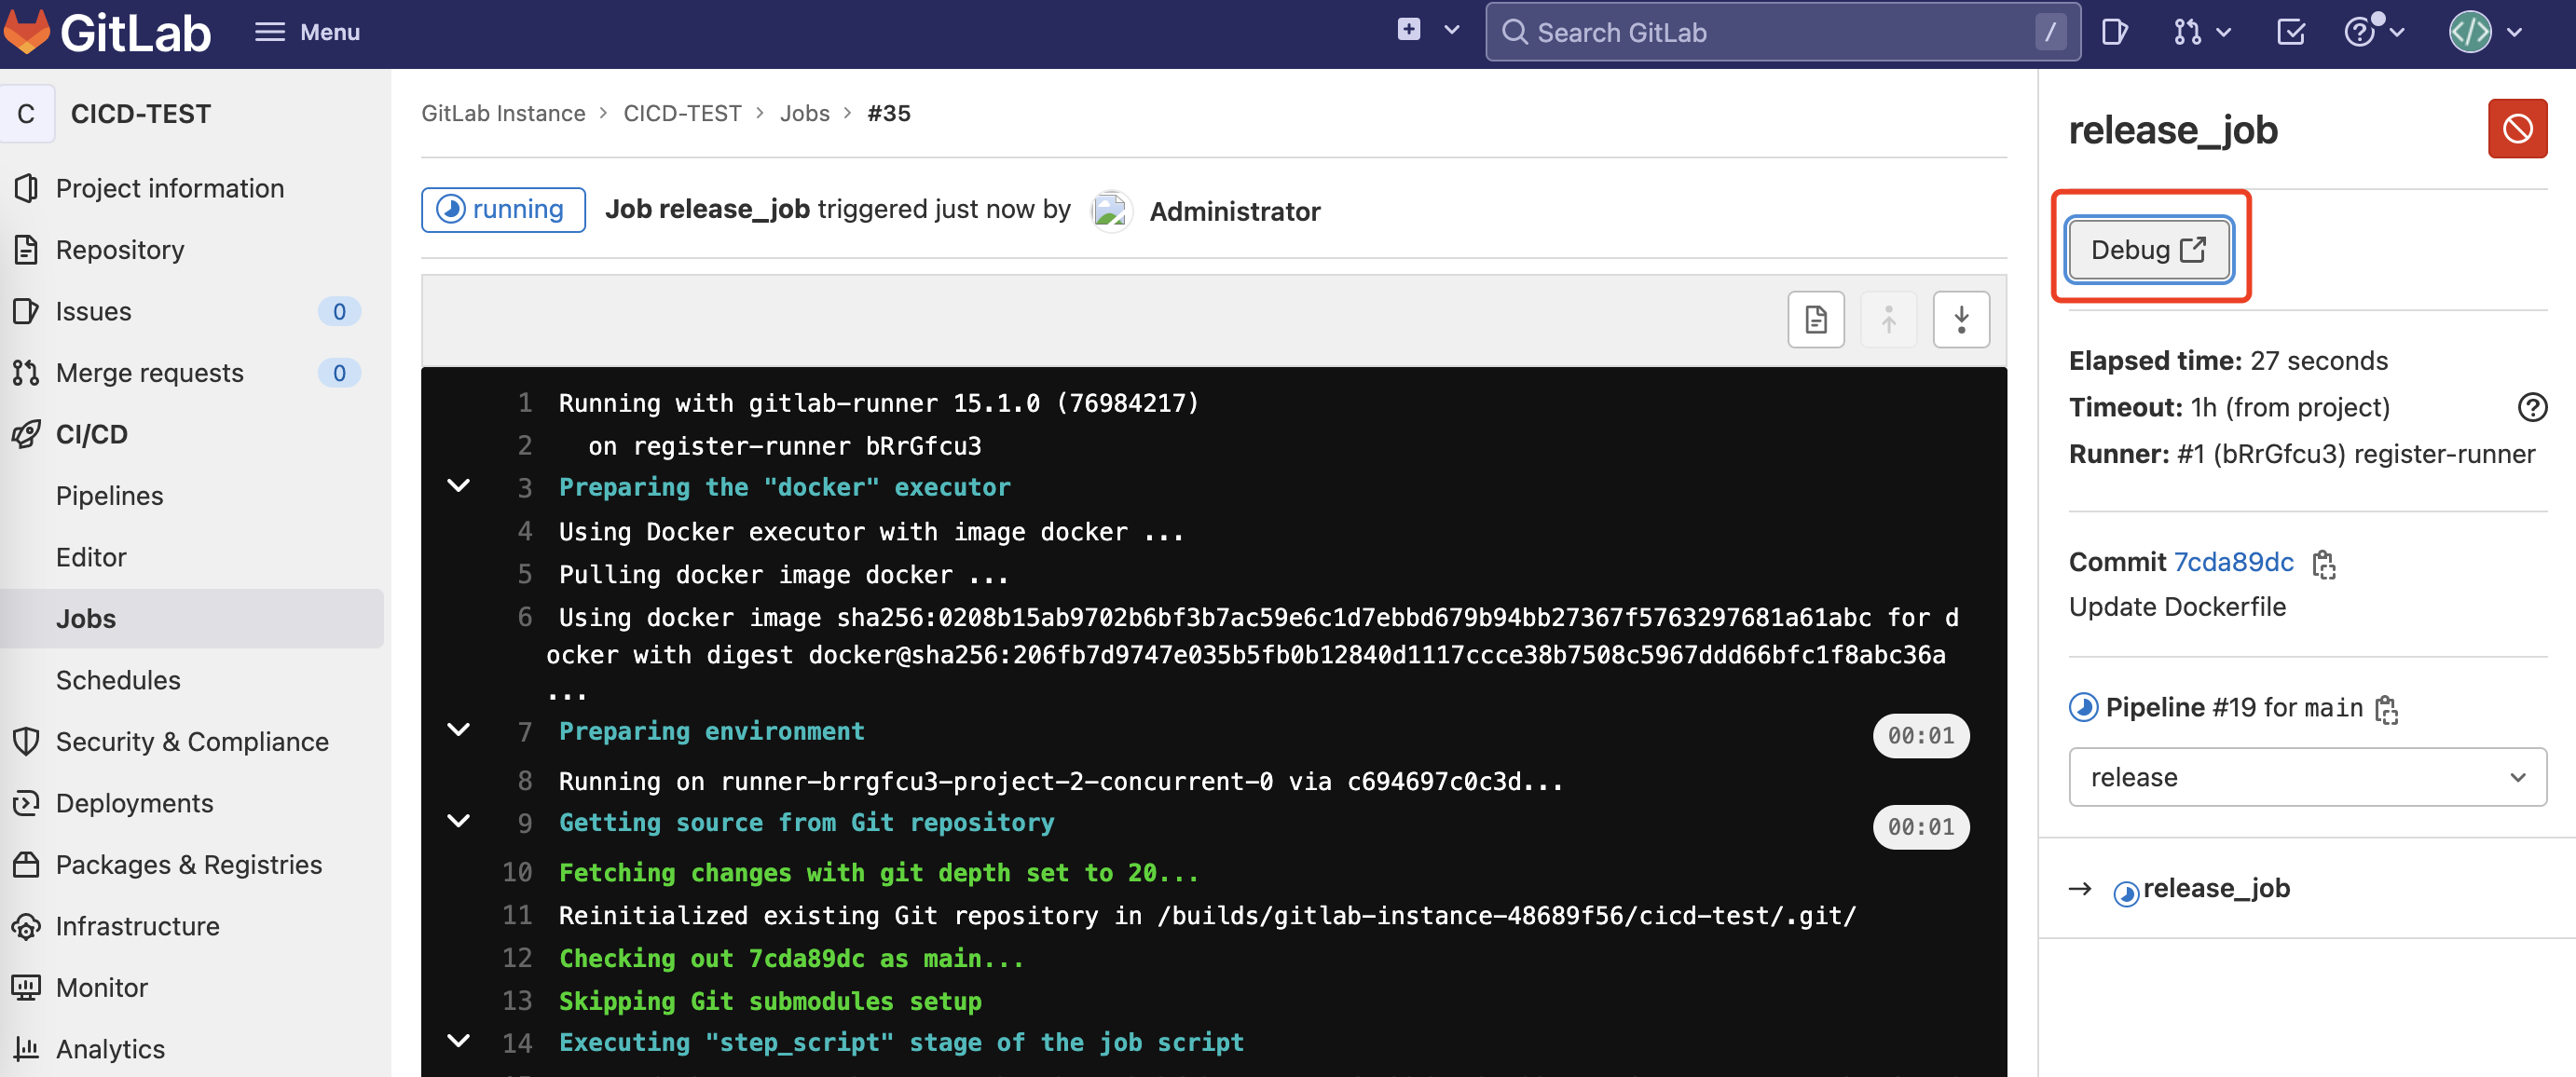
- debug 调试
进入容器进行调试,需要配置 runner 开启 debug。
1 | 打开 runner 配置文件 |
- 部署冻结期
举个例子:节假日公司进入发布封锁期,此时不能随意发布代码,在gitlab中通过 Deploy freezes 来实现指定时间段内禁止执行 job。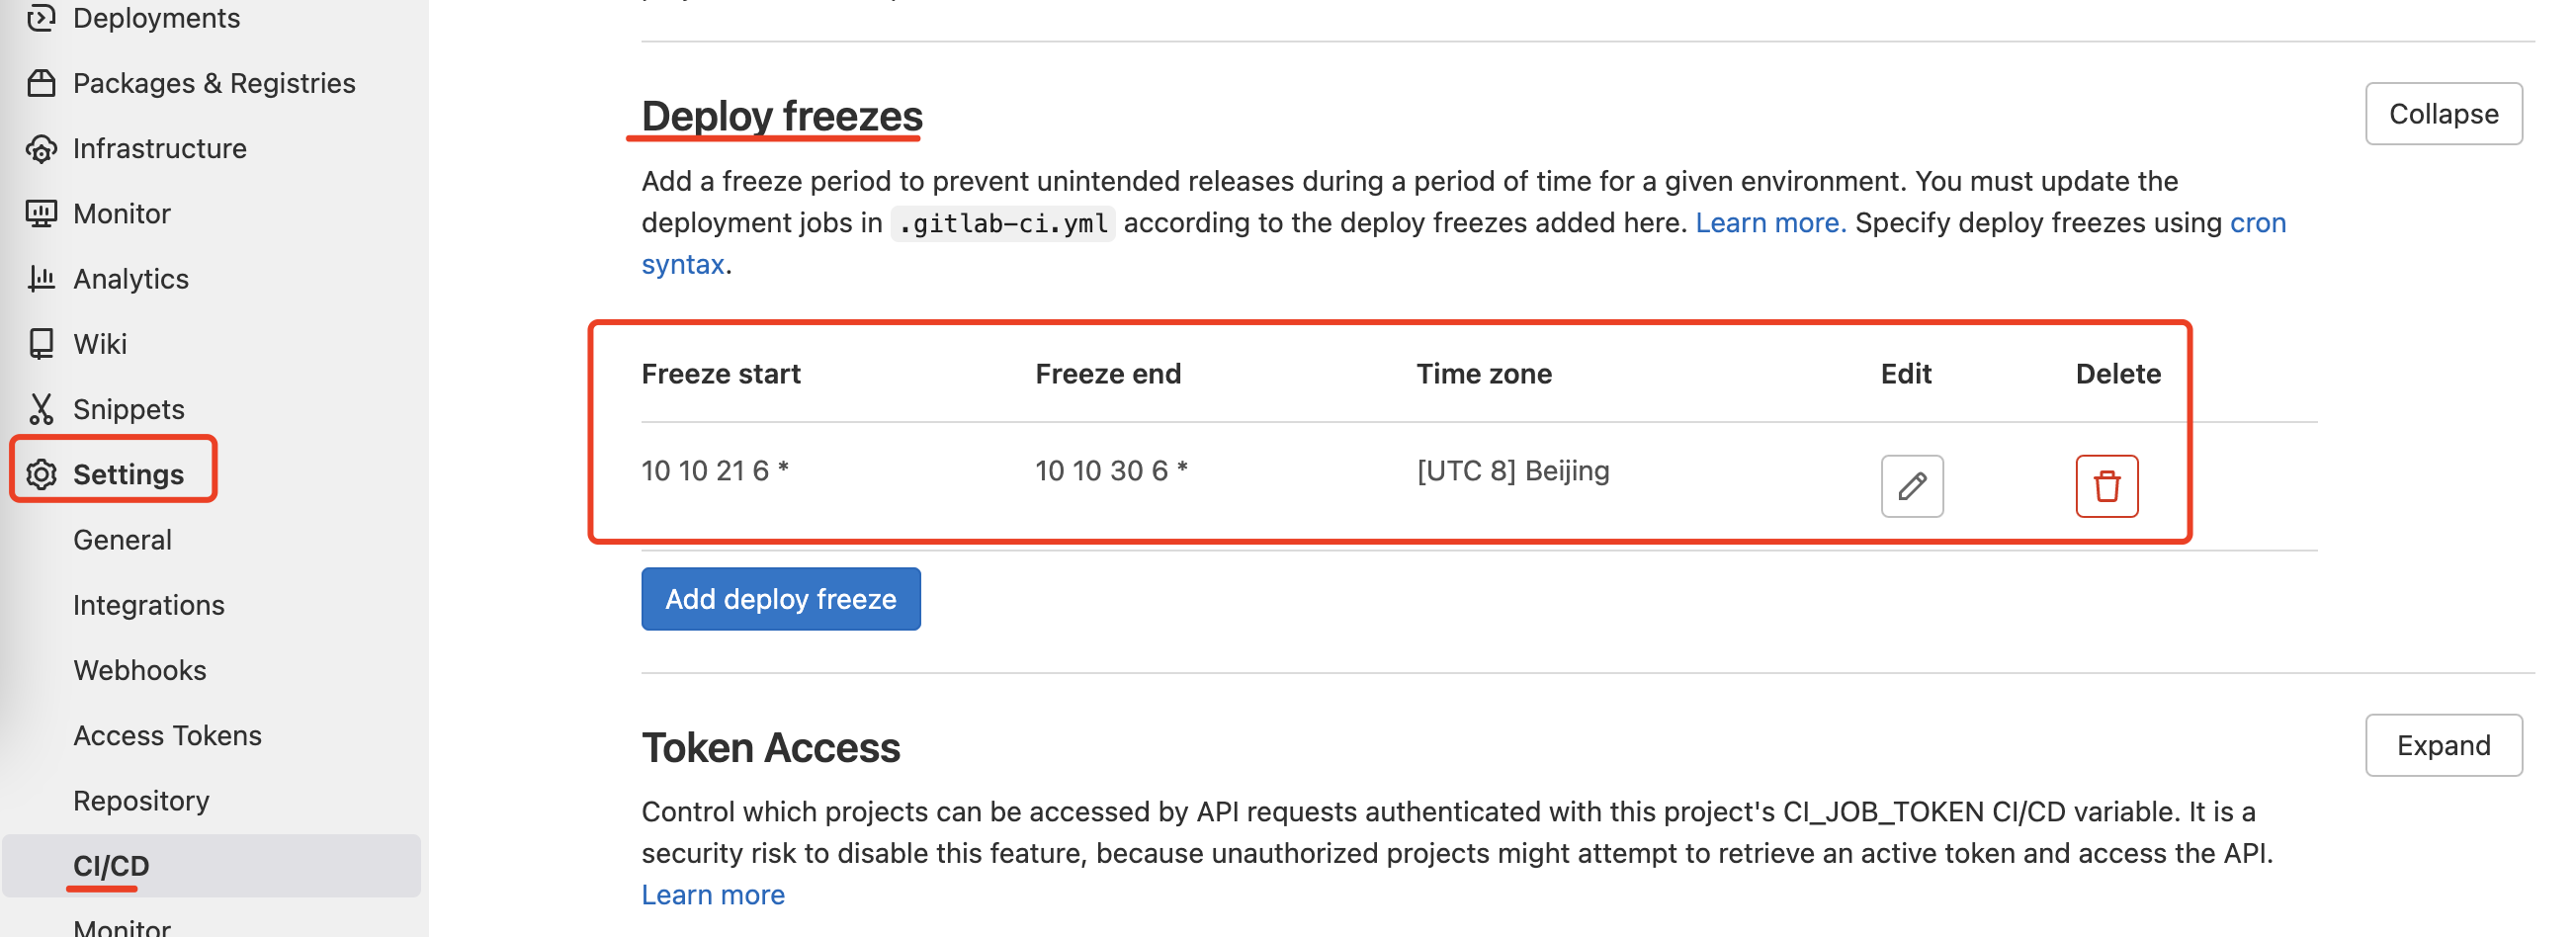
1 | stages: |
由于当前时间在冻结期内, 所以 $CI_DEPLOY_FREEZE为 true,会导致 release_job 不能执行。
实现冻结期需要同时设置以下两点:
① setting 中设置 Deploy freezes
② .gitlab-ci.yml 文件中 job 设置 rules
使用gitlab与docker-file构建部署go应用
项目目录结构:
1 | . |
main.go
1 | package main |
Dockerfile
1 | FROM golang:1.14-alpine |
.gitlab-ci.yml
1 | stages: |
pipeline 执行完后,发现出现一个新的go容器
1 | [root@linux-4core-8g-centos64 config]# docker ps |
此时,可以通过浏览器访问对应接口。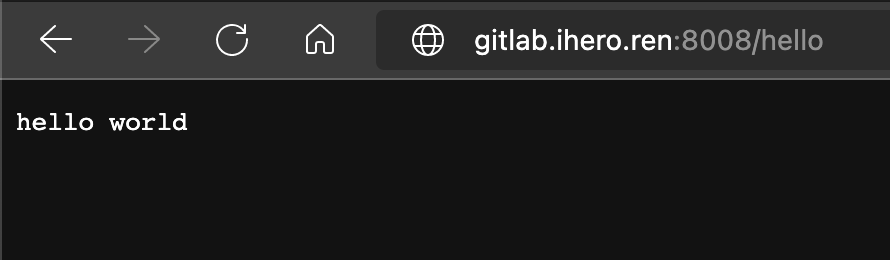
常见报错问题:
① docker: not found
1 | docker build -t goapp . |
此时报错,是因为在 job 中执行时找不到 docker 命令,在 .gitlab-ci.yml 对应的 job 中添加 image: docker 即可。
② dial tcp: lookup docker on 100.100.2.136:53: no such host
1 | error during connect: Post "http://docker:2375/v1.24/build?buildargs=%7B%7D&cachefrom=%5B%5D&cgroupparent=&cpuperiod=0&cpuquota=0&cpusetcpus=&cpusetmems=&cpushares=0&dockerfile=Dockerfile&labels=%7B%7D&memory=0&memswap=0&networkmode=default&rm=1&shmsize=0&t=goapp&target=&ulimits=null&version=1": dial tcp: lookup docker on 100.100.2.136:53: no such host |
此时需要修改 runner 的 config.toml 配置文件,添加 docker volume。
1 | [runners.docker] |
/usr/bin/docker:/usr/bin/docker 把宿主机的 docker 客户端挂载到容器中,在容器内使用
/var/run/docker.sock:/var/run/docker.sock 把宿主机的 Docker daemon 挂载到容器内
8.拓展阅读
1.https://docs.gitlab.com/ee/ci/ 官方
2.https://docs.gitlab.cn/jh/ci/yaml/index.html
3.https://segmentfault.com/a/1190000010442764
4.https://blog.csdn.net/github_35631540/category_11733415.html
5.https://space.bilibili.com/38841498/channel/collectiondetail?sid=148793